AWS Lambdaを使った本格的な開発で使えるServerlessフレームワークを紹介する。Lambda開発をびっくりするぐらい楽にしてくれます。
セットアップ
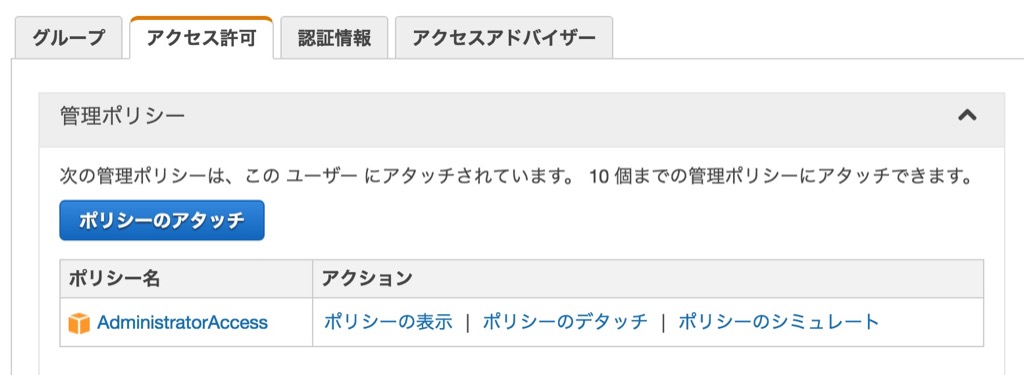
Severless開発で使うIAMユーザーの作成
まずはServerless開発で使うIAMユーザーを作成しよう。このユーザーのアクセス許可にはAdministratorAccessを割り当てる。

Serverlessのインストール
Serverless本体をインストールする。
|
|
$ npm install serverless -g |
Serverlessプロジェクトの作成
Serverlessを無事にインストールできたらプロジェクトを作成する。対話形式で進んでいくので特別迷うところは無い。
※slsはserverlessのエイリアス。
今回作成したサンプルプロジェクトはこんな感じで設定した。
1 2 3 4 5 6 7 8 9 10 11 12 13 14 15 16 17 18 19 20 21 22 23 24 25 26 27 28 29 30 |
_______ __ | _ .-----.----.--.--.-----.----| .-----.-----.-----. | |___| -__| _| | | -__| _| | -__|__ --|__ --| |____ |_____|__| \___/|_____|__| |__|_____|_____|_____| | | | The Serverless Application Framework | | serverless.com, v0.5.6 `-------' Serverless: Initializing Serverless Project... Serverless: Enter a name for this project: (serverless-bkrcff) Serverless: Enter a new stage name for this project: (dev) Serverless: For the "dev" stage, do you want to use an existing Amazon Web Services profile or create a new one? Existing Profile > Create A New Profile Serverless: Please enter the ACCESS KEY ID for your Admin AWS IAM User: XXX Serverless: Enter the SECRET ACCESS KEY for your Admin AWS IAM User: XXX Serverless: Enter the name of your new profile: (serverless-bkrcff_dev) Serverless: Creating stage "dev"... Serverless: Select a new region for your stage: us-east-1 us-west-2 eu-west-1 eu-central-1 > ap-northeast-1 Serverless: Creating region "ap-northeast-1" in stage "dev"... Serverless: Deploying resources to stage "dev" in region "ap-northeast-1" via Cloudformation (~3 minutes)... Serverless: Successfully deployed "dev" resources to "ap-northeast-1" Serverless: Successfully created region "ap-northeast-1" within stage "dev" Serverless: Successfully created stage "dev" Serverless: Successfully initialized project "serverless-bkrcff" |
この中で聞かれるIDとシークレットは当然先ほど作成したIAMユーザーのもの(上記の例ではXXXと書き換えている)。
Lambdaファンクションの作成
首尾よくServerlessプロジェクトを作成できたらプロジェクトルートに移ろう。試しにLambdaファンクションを作ってみる。
|
|
$ sls function create first-endpoint/hello |
このコマンドを打つと対話形式でいくつか質問されるので、API Gatewayのエンドポイントを使うような設定をしてみた。
|
|
Serverless: Please, select a runtime for this new Function > nodejs4.3 python2.7 nodejs (v0.10, soon to be deprecated) Serverless: For this new Function, would you like to create an Endpoint, Event, or just the Function? > Create Endpoint Create Event Just the Function... Serverless: Successfully created function: "first-endpoint/hello" |
このコマンドが完了すると次のようにLambdaファンクションを開発するためのディレクトリが作られている。
1 2 3 4 5 6 7 8 9 10 11 12 13 14 15 16 17 |
. ├── _meta │ ├── resources │ │ └── s-resources-cf-dev-apnortheast1.json │ └── variables │ ├── s-variables-common.json │ ├── s-variables-dev-apnortheast1.json │ └── s-variables-dev.json ├── admin.env ├── first-endpoint │ └── hello │ ├── event.json │ ├── handler.js │ └── s-function.json ├── package.json ├── s-project.json └── s-resources-cf.json |
ここまで来たら後はLambdaファンクションとエンドポイントをデプロイするだけだ。次のコマンドを実行しよう(ファンクションのデプロイを先に実行すること)。
コンソールに表示されるURLにアクセスしてみよう。次のように表示されていれば成功だ。
|
|
{"message":"Go Serverless! Your Lambda function executed successfully!"} |
npmパッケージの入れ方
各Lambdaファンクションはプロジェクト内でいい感じに管理されている。npmパッケージもファンクション毎に管理しよう。
※ファンクション毎がだるかったらhandler.jsを出力するようなビルドを組めばOK
具体的には、ファンクションルート(今回の例で言えば /first-endpoint/hello)にnode_modulesを置き、handler.jsへインポートして使えば良い。


